Level up your programming by using IDEs like WebStorm
Table of Contents
Recommended basics: Articles you should know
To get the full picture of this article, you should know about this topics:
Source code is text. Text can be written in any text editor. It can be as simple as Notepad (Windows) or TextEdit (Mac) and so on. But things get complex as they grow. You can write a small story / exam in those tools as well, but if you plan to write a book, probably they do not fit any longer.
In programming, the text you write, has a strong meaning. While it doesn’t matter how you call a CSS class, it is important to use the same spelling in your HTML and CSS document. If you miss a single character, things will not sum up any longer.
Beside the source code itself, projects can contain other tools as well, for example for file uploads as you saw when uploading your first “about me” page. Please remember, we barely touched the surface yet.
Don’t get scared, there’s a solution to deal with such kind of complexity: IDEs. The phrase IDE stands for
Integrated development environment which basically means it is a program which combines several tools to have a
solid developer experience. It can “understand” your source code, it can add syntax highlighting (nice colors) and
it makes parts of your code clickable so you can better navigate through your code.
This may sound like a “nice to have” right now, but as a professional software developer you always should aim for good IDE support, trust me.
Open your first project in WebStorm #
For this demonstration, I’m using WebStorm.
WebStorm is a paid IDE with a 30 day test period. For writing this article I researched for alternatives to my default IDE (IntelliJ Ultimate). Even if Visual Studio Code is interesting, it is by far not able to catch up with the intelligence provided by JetBrains Tooling. You can do some parts of this demonstration with other IDEs then WebStorm.
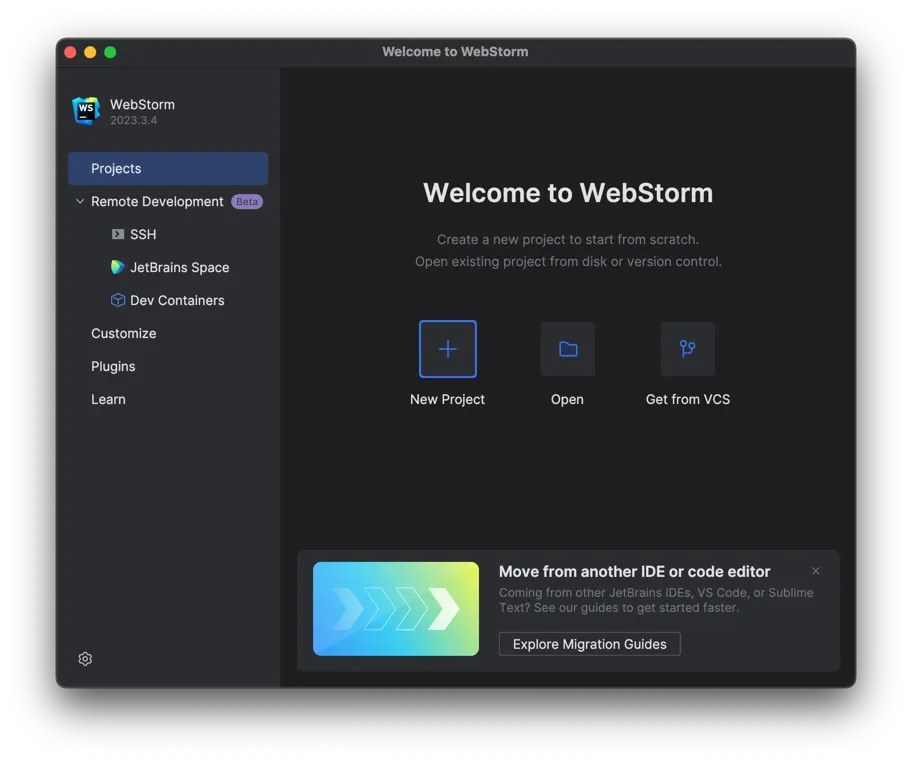
After downloading and starting you should see the welcome screen:
Open your source code #
In WebStorm you can open any folder. After doing so, WebStorm will consider this folder to be a project. Since many IDEs work this way, it is common standard to place all files that are part of your project into this folder (you’ll using subfolders as well for sure).
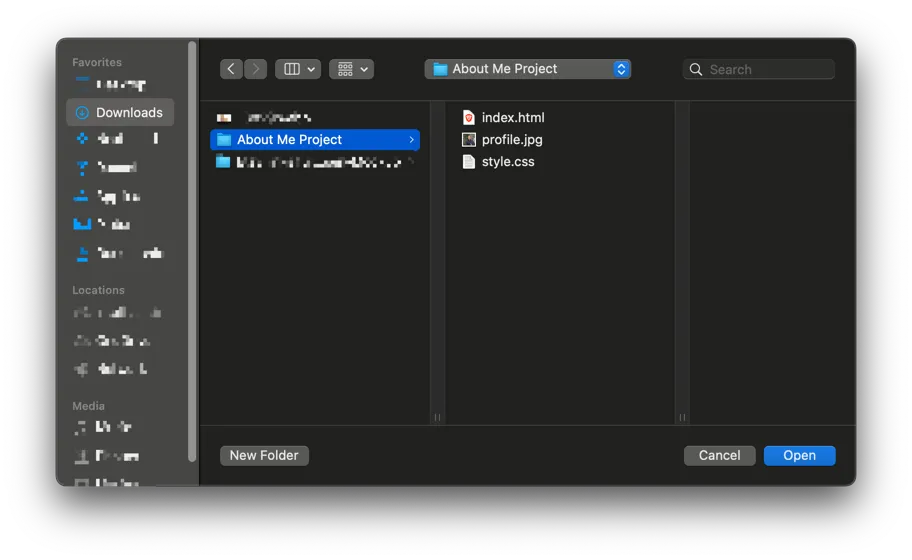
Click on the “Open” button and select the folder containing your source code:
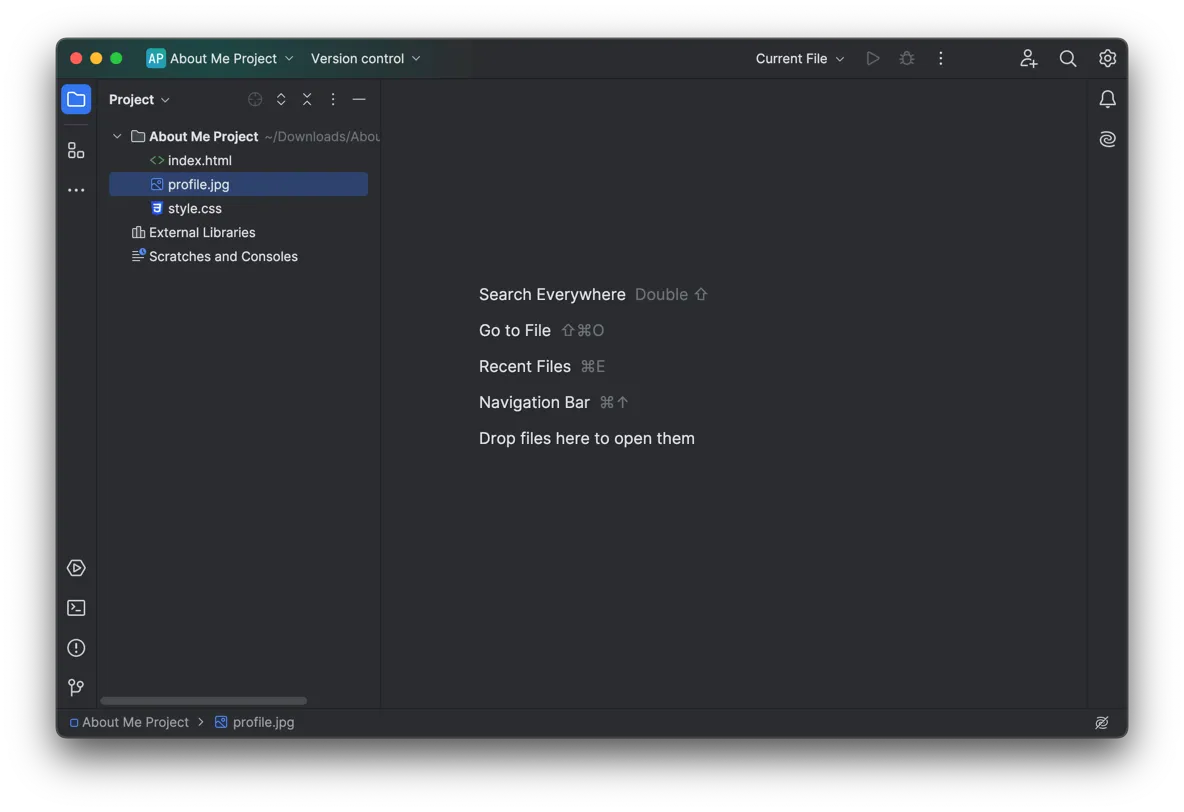
After you have opened the folder, WebStorm will show your files in some file explorer.
Open your HTML file #
You can open your files by double clicking their name in the file tree on the left:
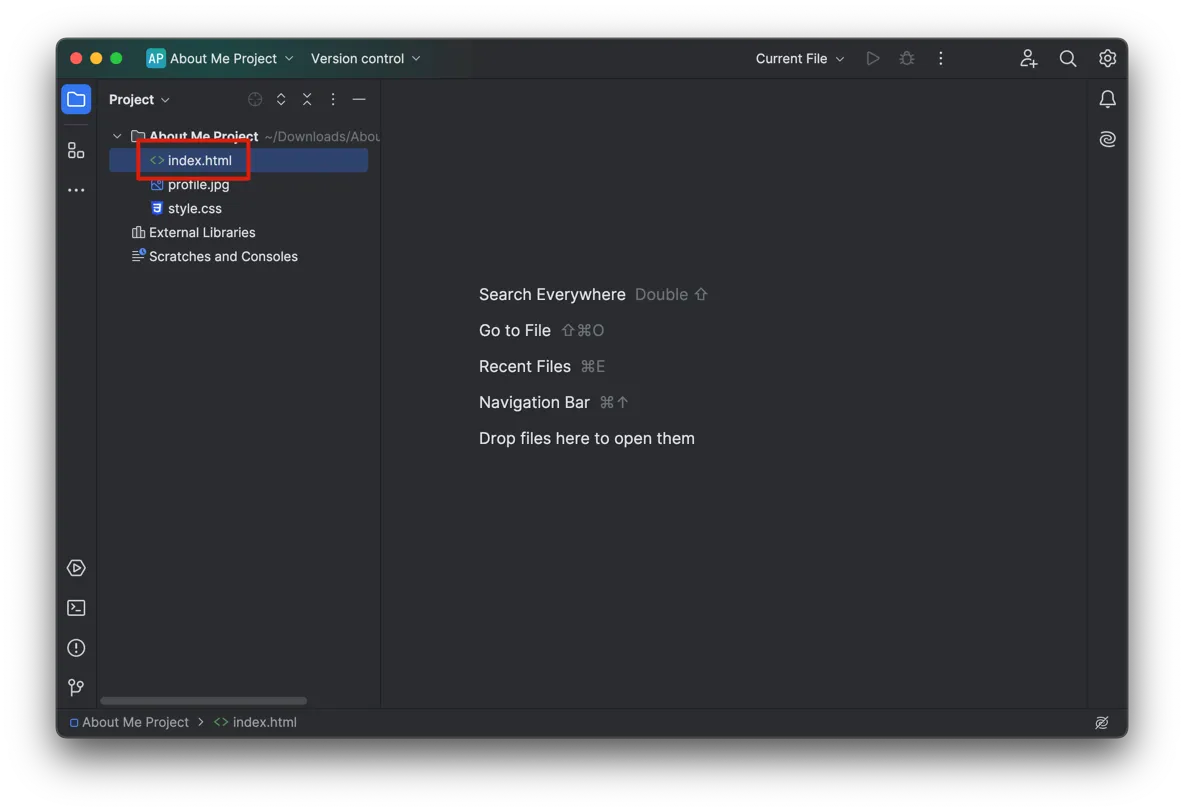
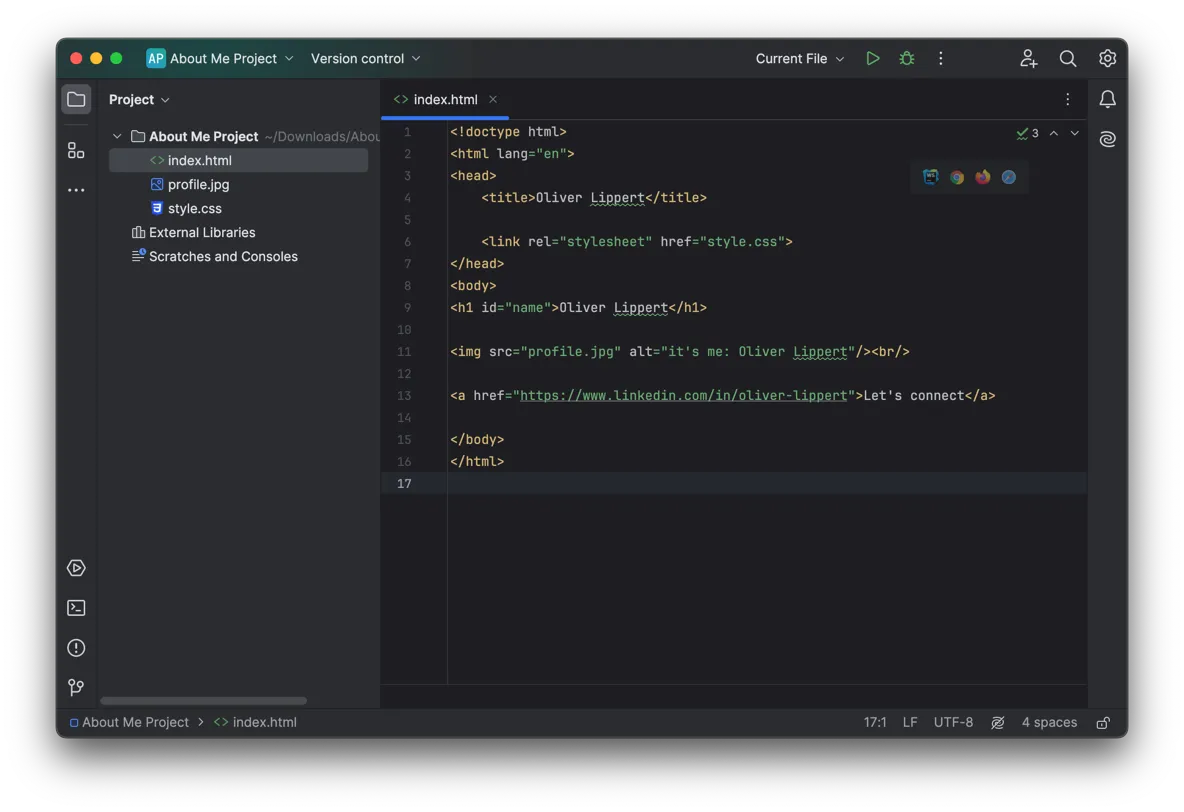
After opening the file, you can see the full content with all the intelligence the IDE can provide to you:
Unlocking easy benefits with IDEs #
The benefits of an IDE strongly depend on the project you are running. So it’s hard to tell individually what benefits you’ll see using an IDE. But based on the small about me page where you’ve written the HTML and CSS code and even started hosting it publicly, I can show you how an IDE will improve your workflows.
Syntax highlighting #
By adding some colors to your source code, your eyes will better be able to navigate through your source code. Compare
these two identical code blocks and try to find the src attribute, one is with syntax highlighting the other
is without. Compare how long you you need to find it:
Code block without syntax highlighting #
| |
Code block with syntax highlighting #
| |
Code completion #
A very handy feature is code completion. Since your IDE is knowing your project it can help you writing code more
easy. While typing, it will show suggestions on what word you probably are typing.
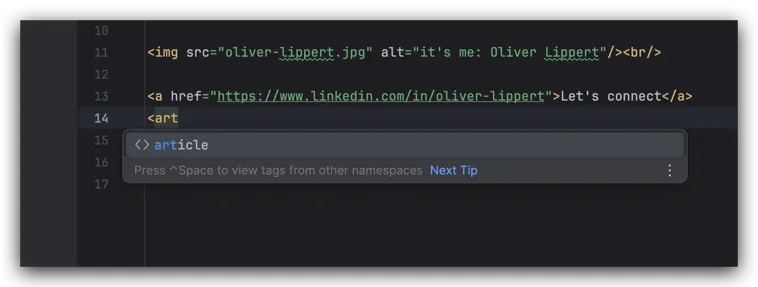
This is a very broad feature, it also will work with files, functions, variables and many other stuff.
Rename support #
A key feature of an IDE is the understanding of references. Let’s walk through 2 showcases so you have an better
understanding how it will help you:
Rename a file #
Your HTML is referencing an image. It is important, that the filename does match, else the image will not be found.
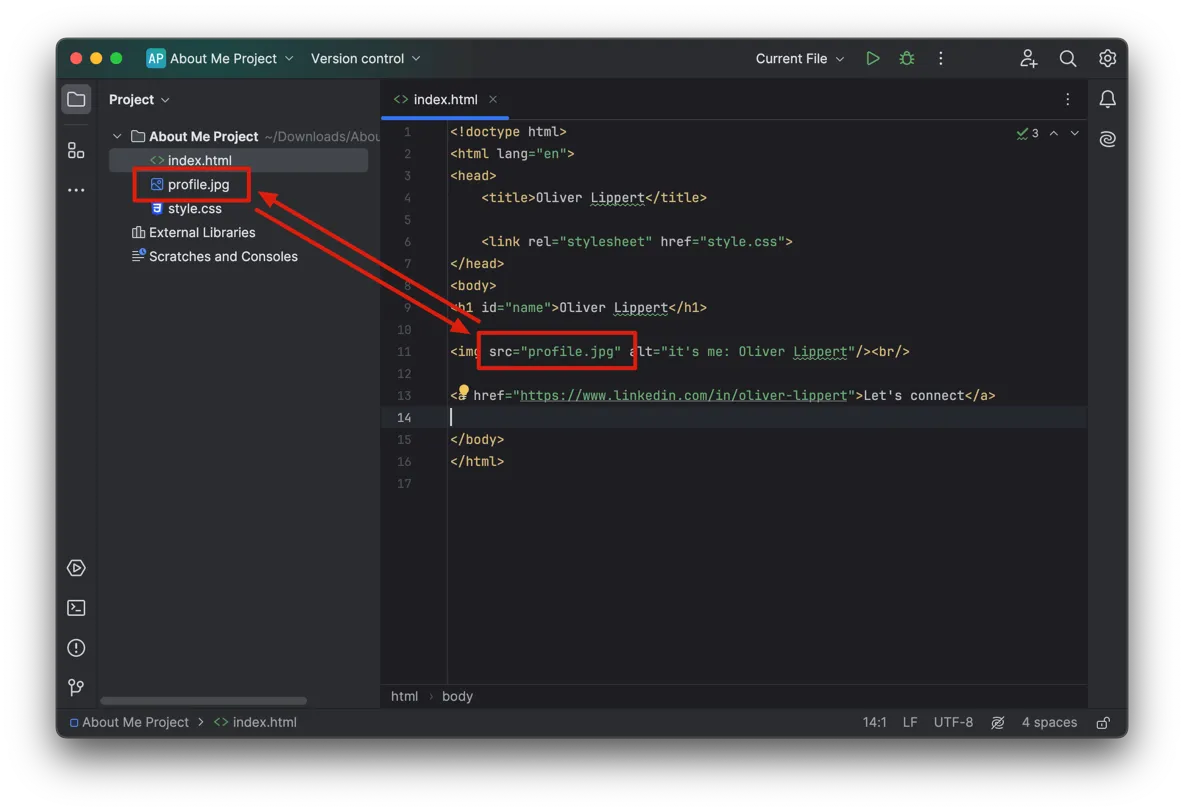
Let’s say we decide to rename this image to oliver-lippert.jpg. If we do this via our native files application, the
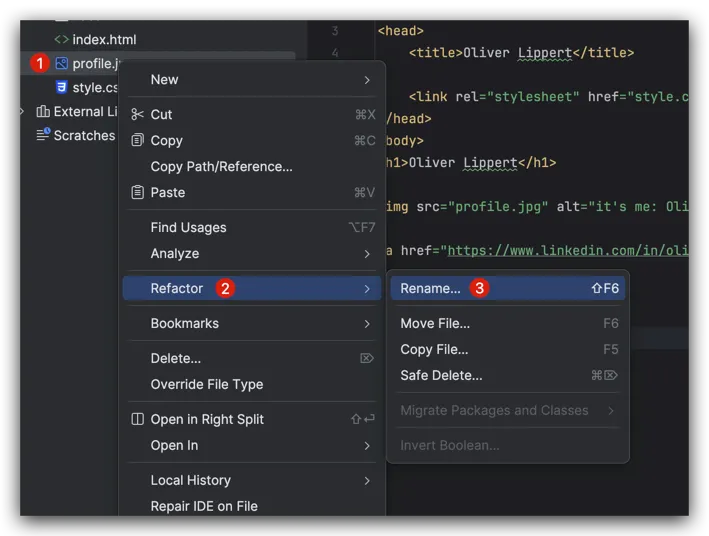
HTML now would reference to an non-existing file. But let’s see what our IDE will do: Right click the file, go to
Refactor and select Rename:
Put in the new file name and confirm the dialog with click on Refactor:
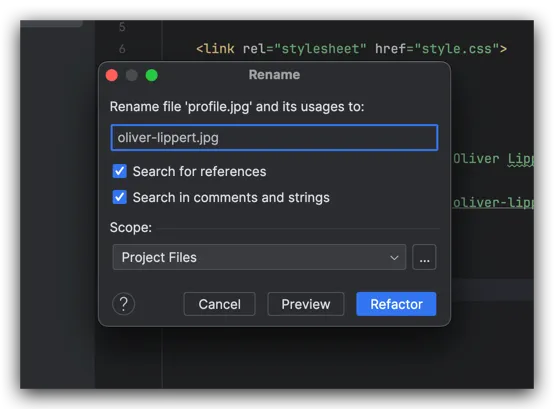
You will see your HTML code to be updated, referencing the new file name:
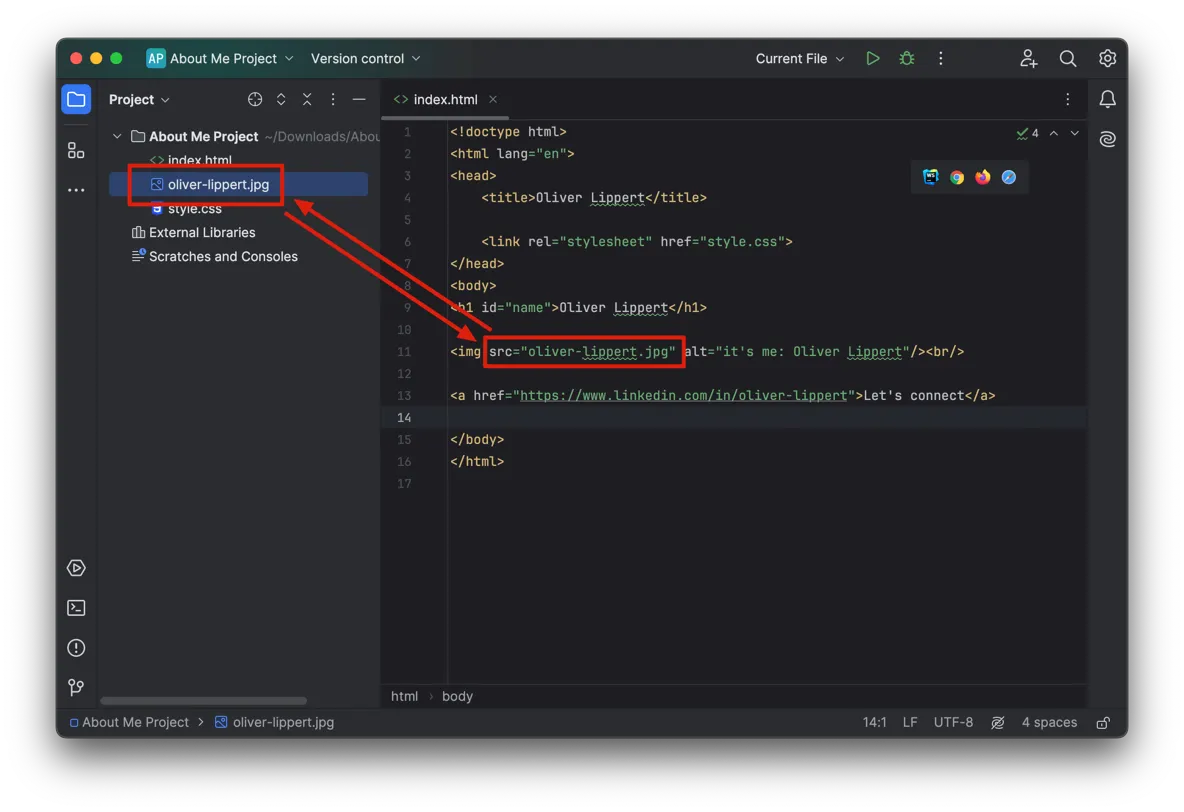
Renaming in source code #
Beside files we can also use refactoring of names for functions, variables or in case of HTML for
classes or ids.
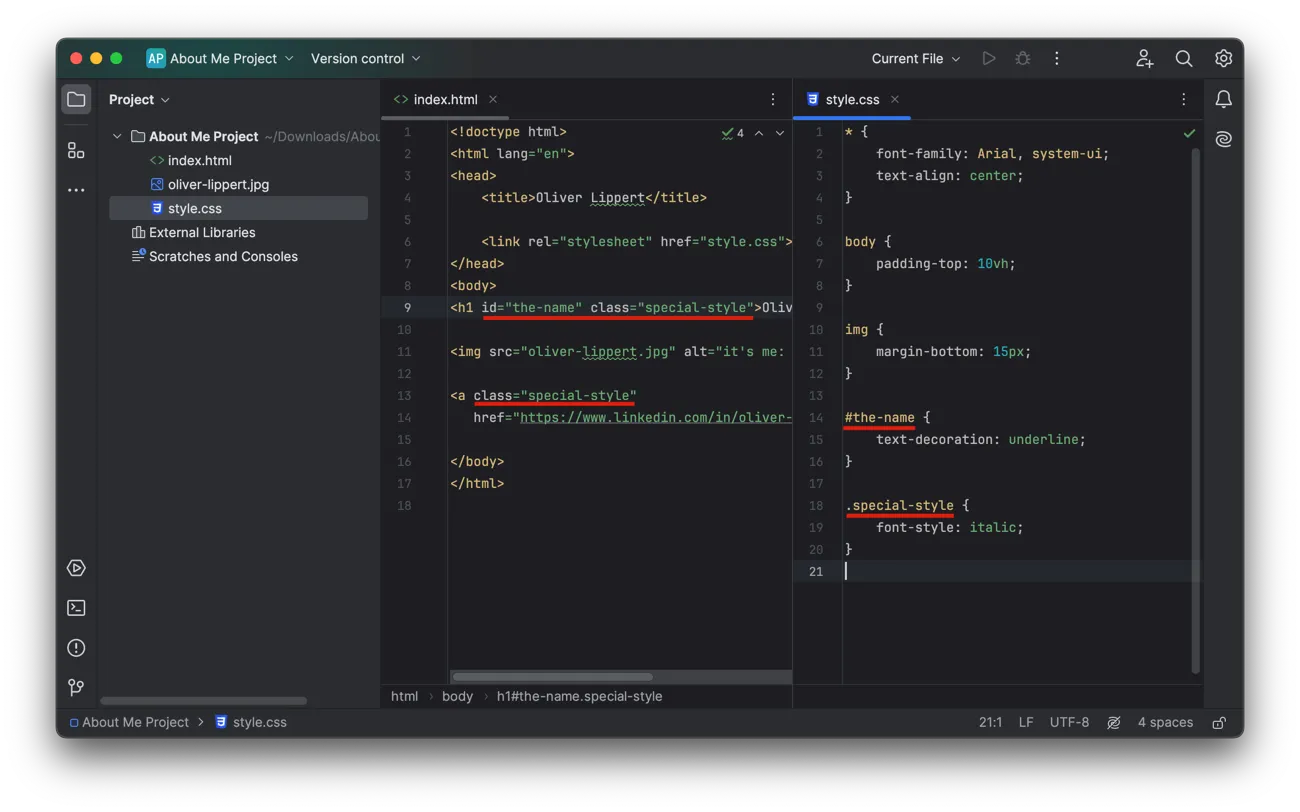
Add an id to your h1 and add a class to your h1 and your a element:
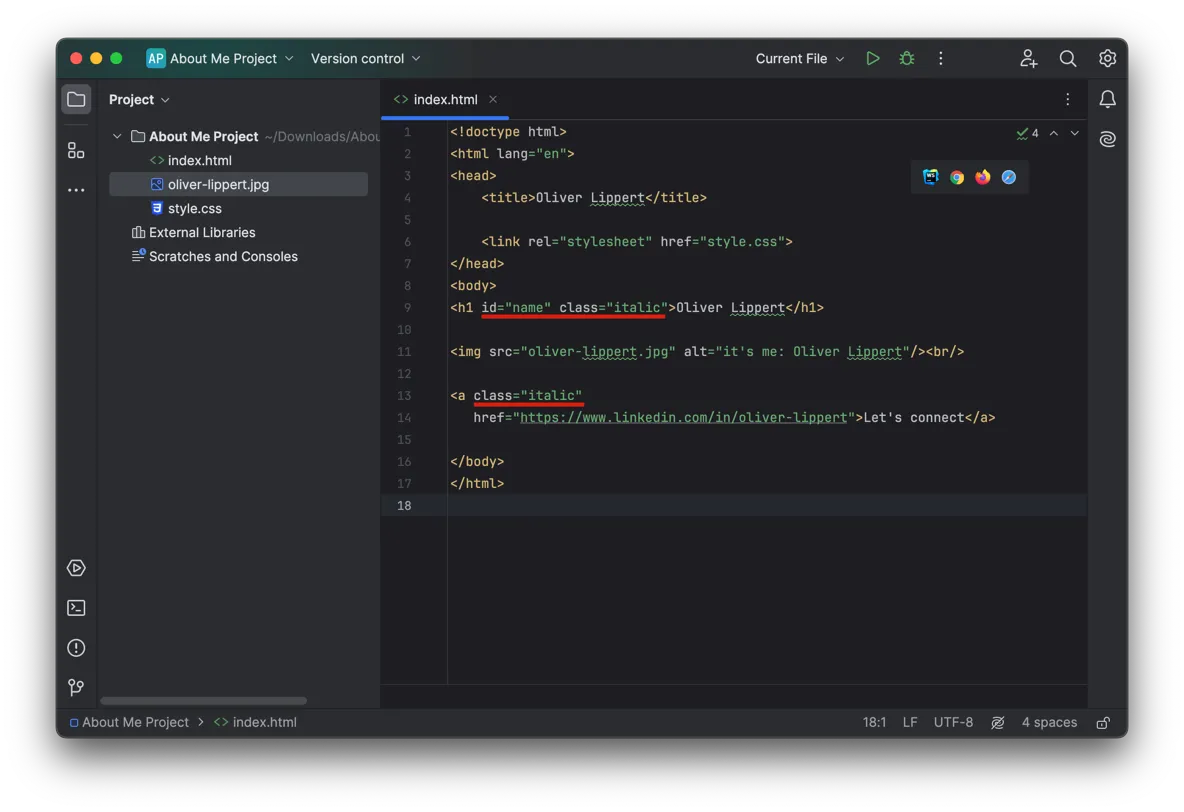
Now let’s add some style to it: Make the id underlined and add italic formatting to the class:
| |
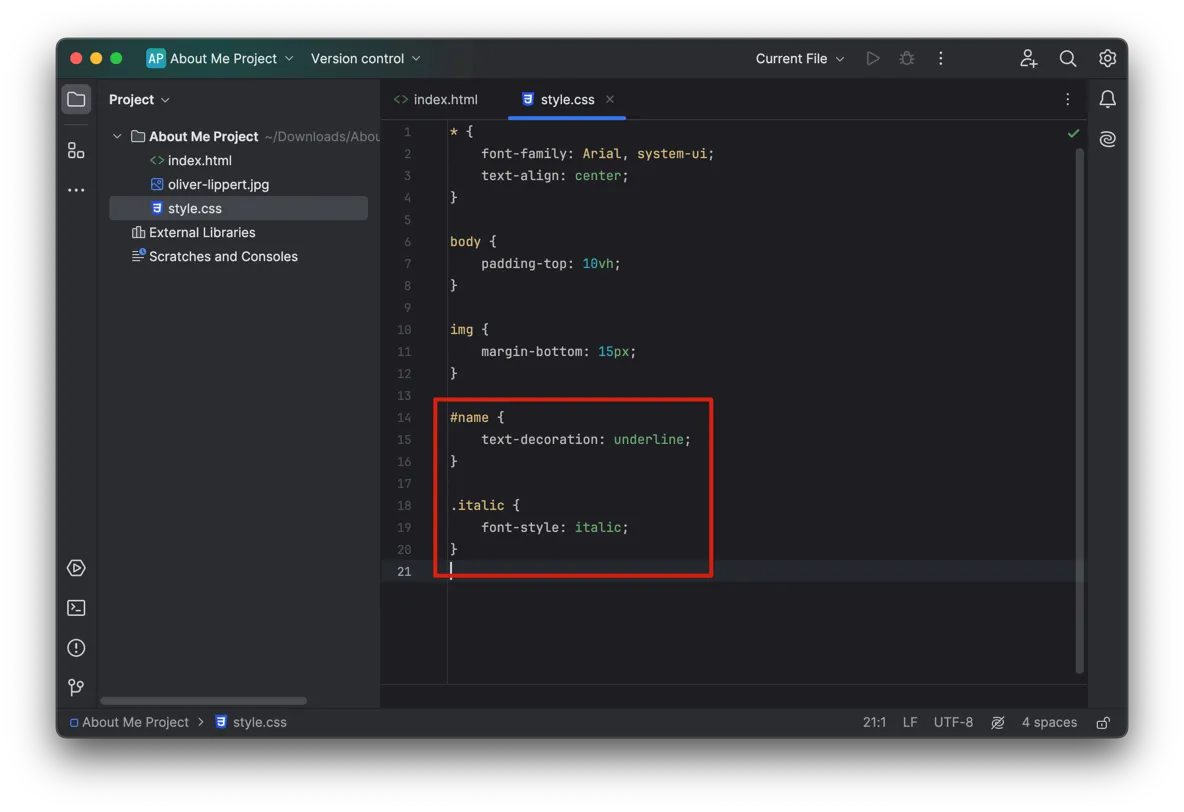
Now let’s rename both: Rename name to the-name and italic to special-style. It doesn’t matter if you rename in
CSS or in HTML: Right click on the text, go to Refactor and select Rename. Type in the proper name and confirm
with Refactor. As you will see, WebStorm is renaming the references to id and class in all places.
Integrate tools #
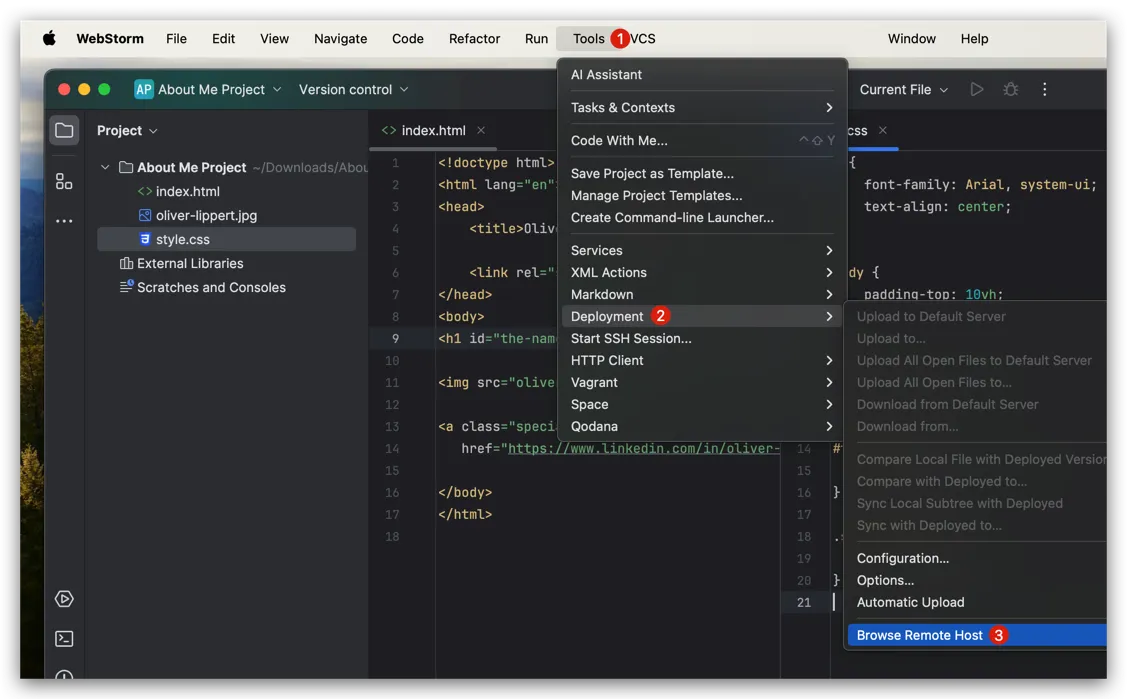
Beside adding colors to your code and understanding references, IDEs also integrate several tools to ease up your
life. Now since we changed files, we probably can update our public about me page. Last time we did it via uploading
files via cPanel file manager. Now let’s use our IDE to do so.
You will connect to your hosting package via FTP (which means: File Transfer Protocol). You generate the credentials
in your hosting package management panel, if you used Namecheap as describe
in my shared hosting introduction, you would create an FTP account via cPanel.
To continue ensure you have the Server, the Username and the Password.
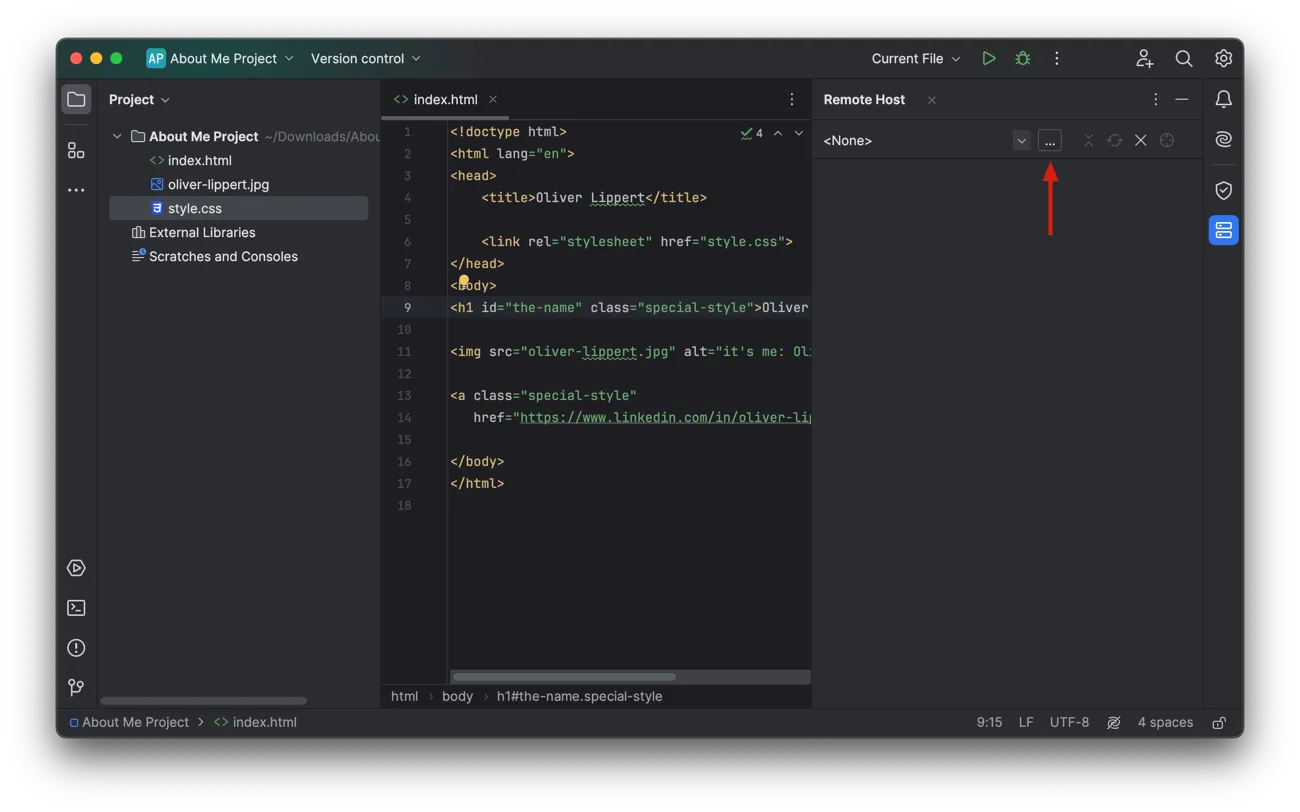
Now click the ... button to start adding a new remote host:
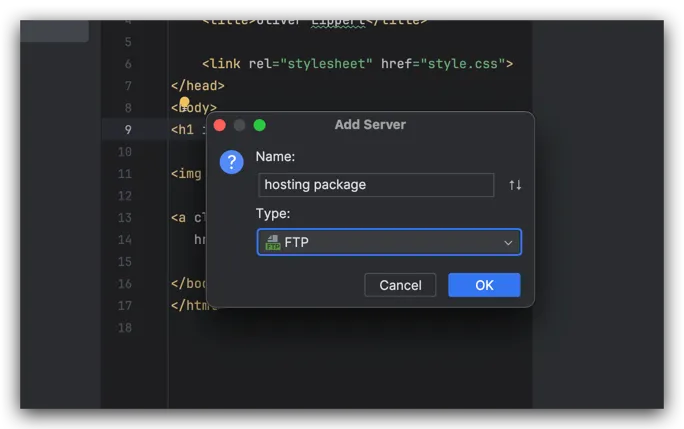
Define some name and select FTP as the type:
Now define Server, Username and the Password in the last step to be able to connect, confirm with OK:
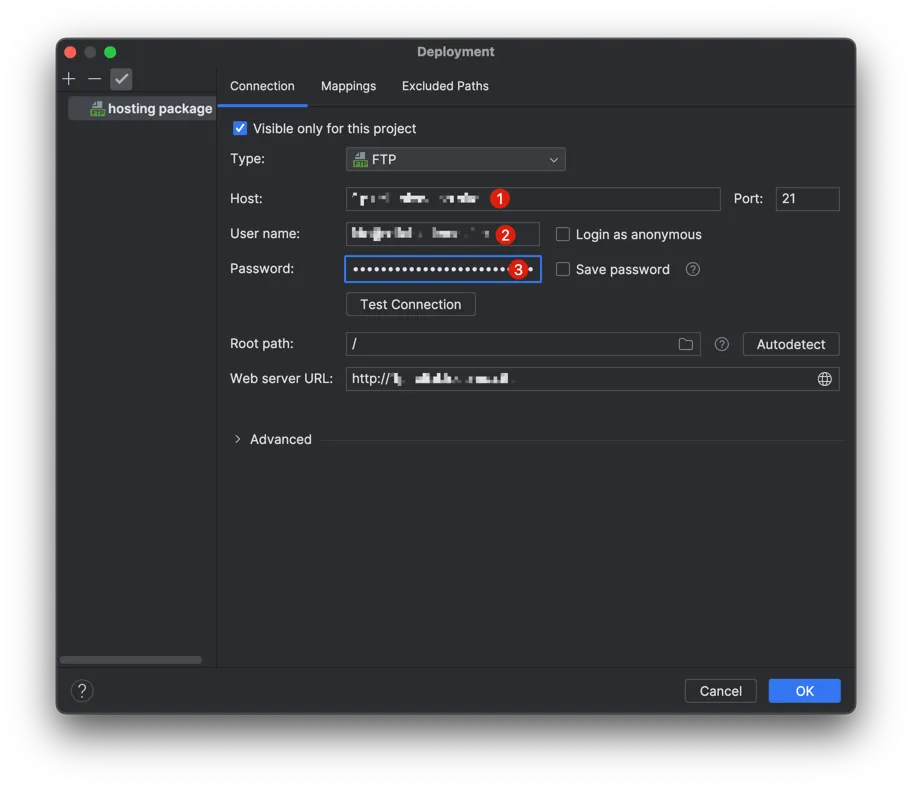
And finally let’s upload our files by just drag and drop them from left to right:
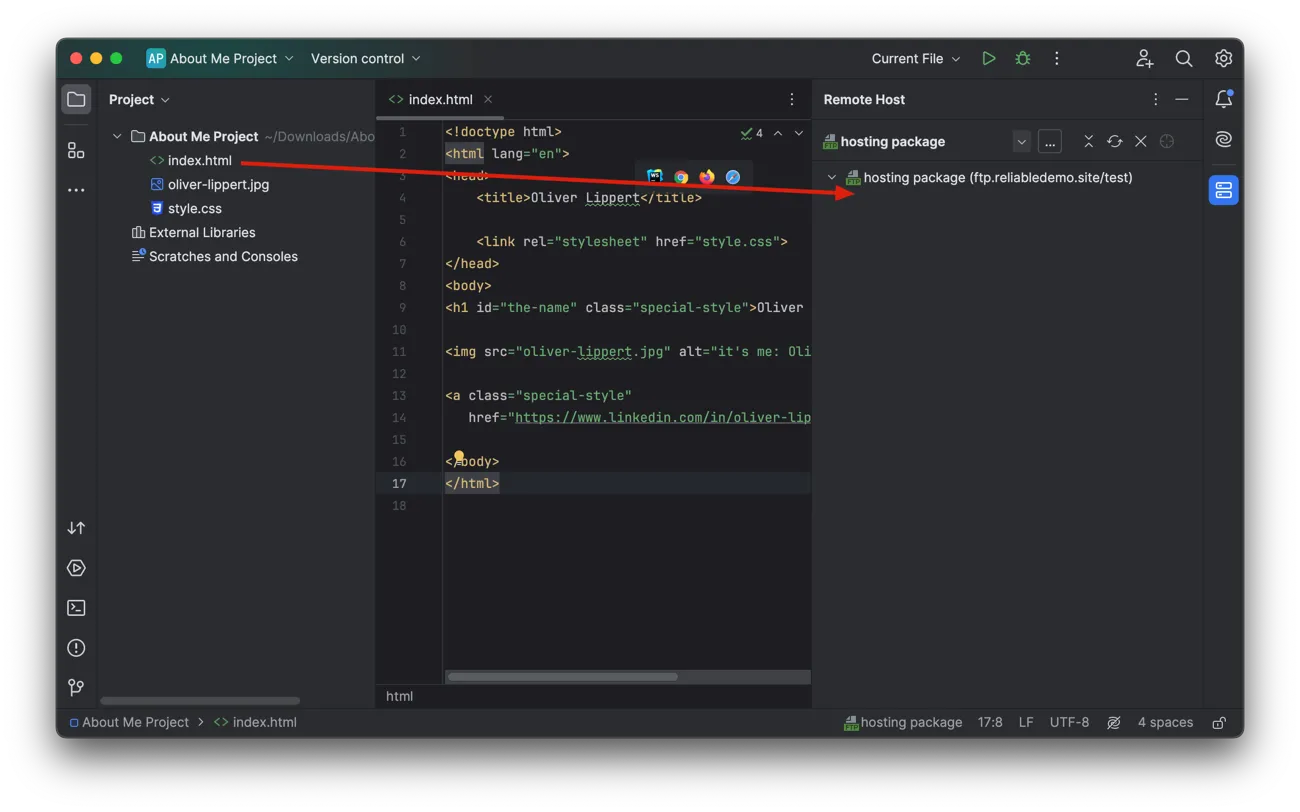
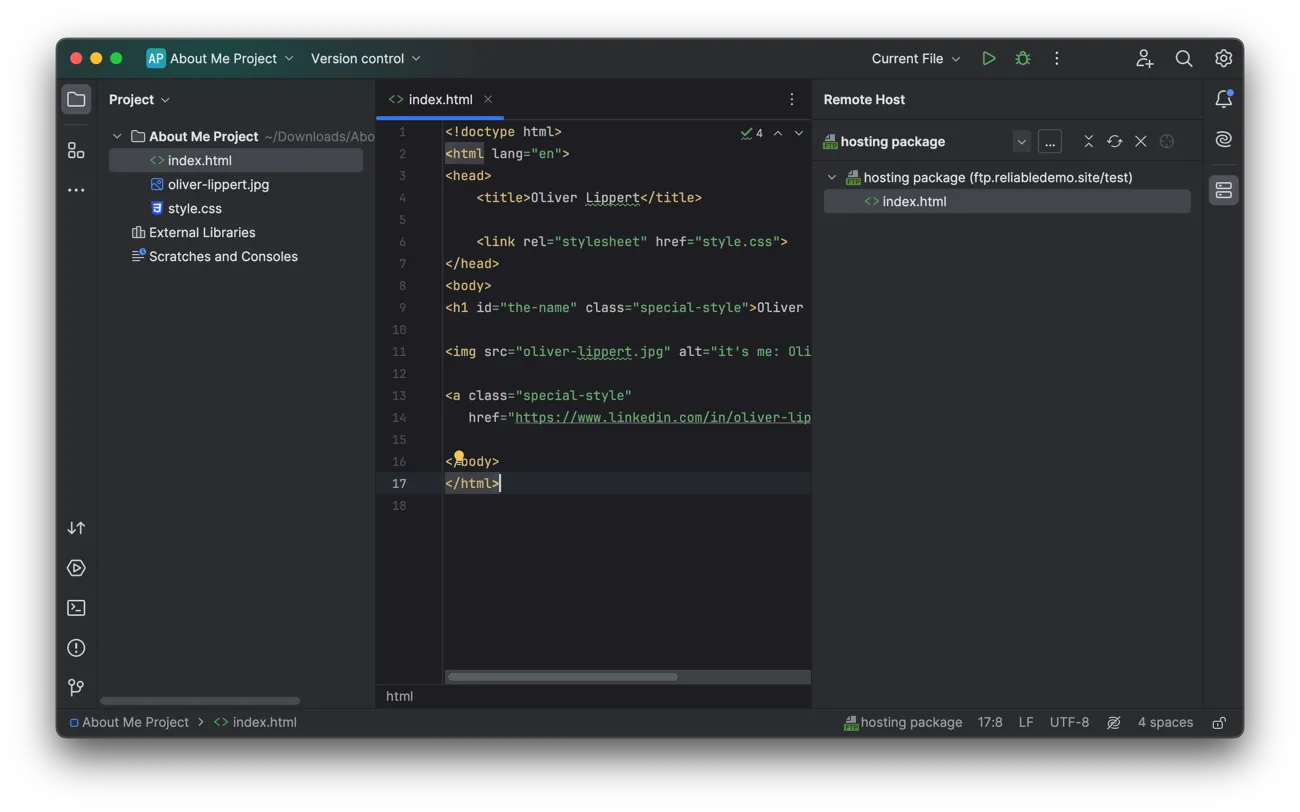
Now on the left you can see your local files while on the right side you can see all remote files:
Embracing IDEs: A necessity for every Project #
This was just a very brief introduction in the idea / benefit of IDEs. You will start customizing them for your needs in your project. It is a very broad topic because it is so dynamic. I do use JetBrains products since 2015 and I got pretty used to it over the time. I really appreciate to do many things without even switching the window.
While you definitely can code without using an IDE, I would say most projects out there agree on using an IDE.
To underline it again: There’s not just WebStorm or IntelliJ. JetBrains has other IDEs and also there’s not just JetBrains but other IDE providers. Take some time, do your research and give it a try. You can switch at any time.
Keep pushing forward: Next articles to improve your skills
With this article in mind, you can keep on reading about these topics: