SSH - Access your server remotely
Table of Contents
Recommended basics: Articles you should know
To get the full picture of this article, you should know about this topics:
You may also want to use the content map to find interesting articles that play into this one.
If you want to access your server from a remote location (e.g. your computer), SSH will be the tool of your choice. Follow me in this article to understand SSH basics, prevent common pitfalls and ensure you’re using it in a secure way.
Configuring SSH the right way should be one of the very first things you do when setting up a server.
What is SSH (Secure Shell)? #
When you’re into development or administration, sooner or later you need to do something on a remote computer / server. Often, remote means, you cannot physically go to that computer and do whatever you’re supposed to do. Maybe that computer not even has keyboard or monitor. So what now?
You can connect to that server to use your local computer and run any command as if you you would run it on your local computer.
While it’s great that we have such tools in place it comes with a risk of attackers getting access to your server and do things you don’t want them to do.
Can SSH only be used with own Servers / VPS? #
SSH can be used even if you don’t host your own VPS. Maybe you just have your own shared webhosting, some providers (like Namecheap) offer SSH access there as well.
Also, you can use SSH to clone Git repositories.
As you see, SSH can be used in more scenarios then just to access your remote server.
Can SSH only be used for command execution? #
Beside remote command execution, I tend to use SSH for file transfer. I do this by configuring rclone to use sftp
as connection method. This way I can push many files very fast and I can even sync, instead of copy, directories.
Do I use SSH with username and password, similar to the operating system login? #
While you absolutely could do this, for security reasons you shouldn’t. This is because attackers could run attacks against your Server and at some time be able to login (simplified speaking).
So what do use instead?
What is an SSH key and why use it instead? #
The most simple description of a private key probably is a very long password, that never ever would leave your device. But how would the remote server than check that it’s correct?
Asymmetric encryption in SSH #
I’ll not cover mathematics, but at least the rough idea: SSH keys rely on asymmetric encryption, where you have a public and a private key. You need to share the public key with others, but you’ll never share the private key with anybody.
Public key - encrypt data #
As said, you can or even need to share the public key with the services, you want to connect to.
The public key is used to encrypt data. Once encrypted you cannot decrypt that data using the public key. To decrypt such data, you’d need the correct private key.
Private key - decrypt data #
As said, you never share the private key (as you can guess by the name). I’m serious, do not share that key with anybody. Store it in a safe place.
The private key is used to decrypt data, that was encrypted with the matching public key. That means private and public key always come up as a pair. You cannot exchange one part of them, you always would need to replace both.
How SSH authenticates with keys #
Having public and private keys in mind, it’s almost simple:
- You open the connection to the server
- With that, you send your public keys
- Server checks if it knows one of the public keys
- If so, it does create a random string (called
challenge), encodes it (using that public key) and sends it back to you - Using the private key (that’s just on your device) you decrypt that data and send it back
- Server checks if what you sent back is what he encrypted for you
- The connection if successful if both values do match
As you can see, this is a system where nobody needs to trust anybody else. Nobody has the private key except you and nobody can do what you could, using the public key you shared with them.
Even if a service that holds your public key would get hacked, so that someone else now has your public key, that doesn’t pose any risk to you. That’s a whole different story for username/password authentication methods.
How to generate SSH keys? #
You probably wonder, where to get these SSH keys? If you think about that, esp. the private key, there’s just one way: You generate them yourself. Only this way your private key wouldn’t leave your device.
You should simply use your computers shell / terminal to generate the keys. Try this command:
| |
If you deal with some older installations / legacy systems, you can pick another encryption method, probably:
| |
The command now will guide you through the process, usually you can leave everything as default and a keypair will be generated.
The keypair consists of two files that have the same name, but a different ending. The private key for example could
be called id_ed25519 and the matching public key then will be id_ed25519.pub. By default, keys will be put into the
.ssh folder in your users home directory (~/.ssh).
What’s inside an SSH key file? #
SSH keys are files, as you can see. Let’s view the files content.
IMPORTANT: Do not use these keys since I made them public here.
Public key (id_ed25519.pub):
| |
Private key without passphrase (id_ed25519):
| |
I willingly replaced a character in the private key, so that the keypair is invalid and cannot be used by anybody. Never use publicly available keys. They are not private anymore.
What is a passphrase? #
During generation of a keypair, you’ll get asked to define a passphrase. The idea is to use this value, to encrypt the private key on your device, so even if it get’s stolen, nobody can use that file.
The small drawback is that everytime you wanna use that private key, you need to put in this passphrase. And if you ever forget it, there’s no way to reset it. At the end it’s up to you.
I regenerated the SSH keypair using a passphrase, now the private key looks like this:
| |
Remember: The passphrase is just used to encrypt the private key. The public key hasn’t changed, it is still readable so you can share it easily.
Demo: Encrypt / Decrypt data using public / private key. #
Let’s give it some test. Let’s act like being an SSH Server: We create a challenge, encrypt it with the public key and try to decrypt it using the private key.
I’ll use age as a command line tool to do that. It is simpler to understand and
does come with native ed25519 support.
Encrypt a file using public key #
First, we need a file. Let’s quickly create it with some nice content:
| |
Next, let’s encrypt it:
| |
Let’s break this down:
- We call
age - We ask it to encrypt something (using
--encrypt) - We specify the public key to use (using
--recipients-file ~/.ssh/id_ed25519.pub) - We tell it where to write the encrypted data to (using
--output encrypted.txt) - Finally, we tell it what to encrypt (
original.txtin our case)
Now, let’s lookup that file:
> cat encrypted.txt
age-encryption.org/v1
-> ssh-ed25519 UY5WyQ qSeIeLKzFl1wLy1qMJinynDpE5ESPF+FIVUKEztihSk
W6Ut1FPUhHpH7A32lTDkU5MRqf3CERjn2MuqVL2Y61A
--- +B6bUg/WJNSDNaXP67saU6OYkcXLM+W8hTlTVybF2zI
���P�x��.�9	��>~��>��n���)e�[�j �R���u�E/4%
Well, that’s hard to read, I’d say.
Decrypt a file using private key #
As of our process, this data would be sent over to the client, which needs to decrypt it. Let’s try and find out:
| |
If you now review the decrypted files content, you’ll see:
> cat decrypted.txt
https://reliable.codes
That worked pretty good, I’d say.
How to add an public key to a server? #
Before you can use your SSH key, you must tell the server about your public key. Think of it like a “whitelist”. Whoever is on in, has a chance to let be through, but if your key is not on the list, you have no chance.
This “whitelist” is managed by the authorized_keys file which is located within the .ssh folder in your users home
directory (~/.ssh).
This means: You don’t add public keys to servers, but to users.
The file is pretty simple: Every line holds a new public key. If I would have a fresh server, and just would add the key generated earlier, it would look like this:
| |
Now you see why that comment that we specified before is useful even if it has no technical impact. If you run that server for some time and probably use multiple tools to do stuff, you end up in multiple entries to that file. When it’s time to clean up, you need a way to identify, what entries you want to be gone and which needs to survive.
The simplest way to add public keys is pushing it using SSH. Either with an already existing SSH key or with username and password, if you have a freshly set up server. Pro tip: With some VPS providers (like Hetzner), you can define the SSH keys directly in the setup. I’ll show this in the upcoming sections.
On my fresh server there’s just the root user, so I push my key using that users credentials:
| |
Let’s break this down:
- We call
ssh-copy-id - We tell it to use our private key (see
$HOME/.ssh/id_ed25519) - We tell it to connect as user
root(seeroot@) - We tell it to connect to
2a01:4f9:c013:2907::1(see@2a01:4f9:c013:2907::1)
I have a IPv6 only VPS here, you can replace the IPv6 with any IPv4, the command doesn’t change.
Whenever you do the first connection to a remote server, SSH will show you a fingerprint and ask if you trust that server.
| |
I have a fresh server, so I accept the fingerprint (type yes and hit return). Now SSH will ask you for a password.
Once you send the correct password, you’re logged into the system. Now you’re working as the given user (root in my
case) on that server.
The command should exit immediately with a success message.
How to connect to a server via SSH using a private key? #
Connecting to a server using a private key is almost identical to the command not using a private key:
| |
As you can see, with only adding -i argument we can specify the private key to use for this connection. Also, now
there’s no password that you need to put in, you’re directly logged in.
How to restrict SSH connections to private key only? #
It’s quiet cool to use SSH keys to connect to servers AND it’s safe. But you must not confuse the “ability” to use SSH keys with “the only option”. Your VPS by default still accepts connections without SSH keys, after adding your public key, you really should consider to enforce SSH keys.
Important: Ensure that you have a valid private key and you can connect to your VPS before enforcing SSH keys.
Often it now get’s recommended to modify /etc/ssh/sshd_config, but I’d rather create a
/etc/ssh/sshd_config.d/01-ssh-key.conf with the following content:
PasswordAuthentication no
PermitEmptyPasswords no
PubkeyAuthentication yes
ChallengeResponseAuthentication no
Now save the file and restart the SSH server (this is important to apply the new file):
| |
From this point on, you shouldn’t be able to connect any longer using username/password. If you ever want to revert
that decision, you can now simply delete that file again, restart sshd and you’re fine.
Simplify VPS setup by directly using SSH keys #
During the few-click-setup of new Servers in Hetzner cloud console, you can easily have your SSH key pre-installed. And you don’t even need to enter it. How cool is that?
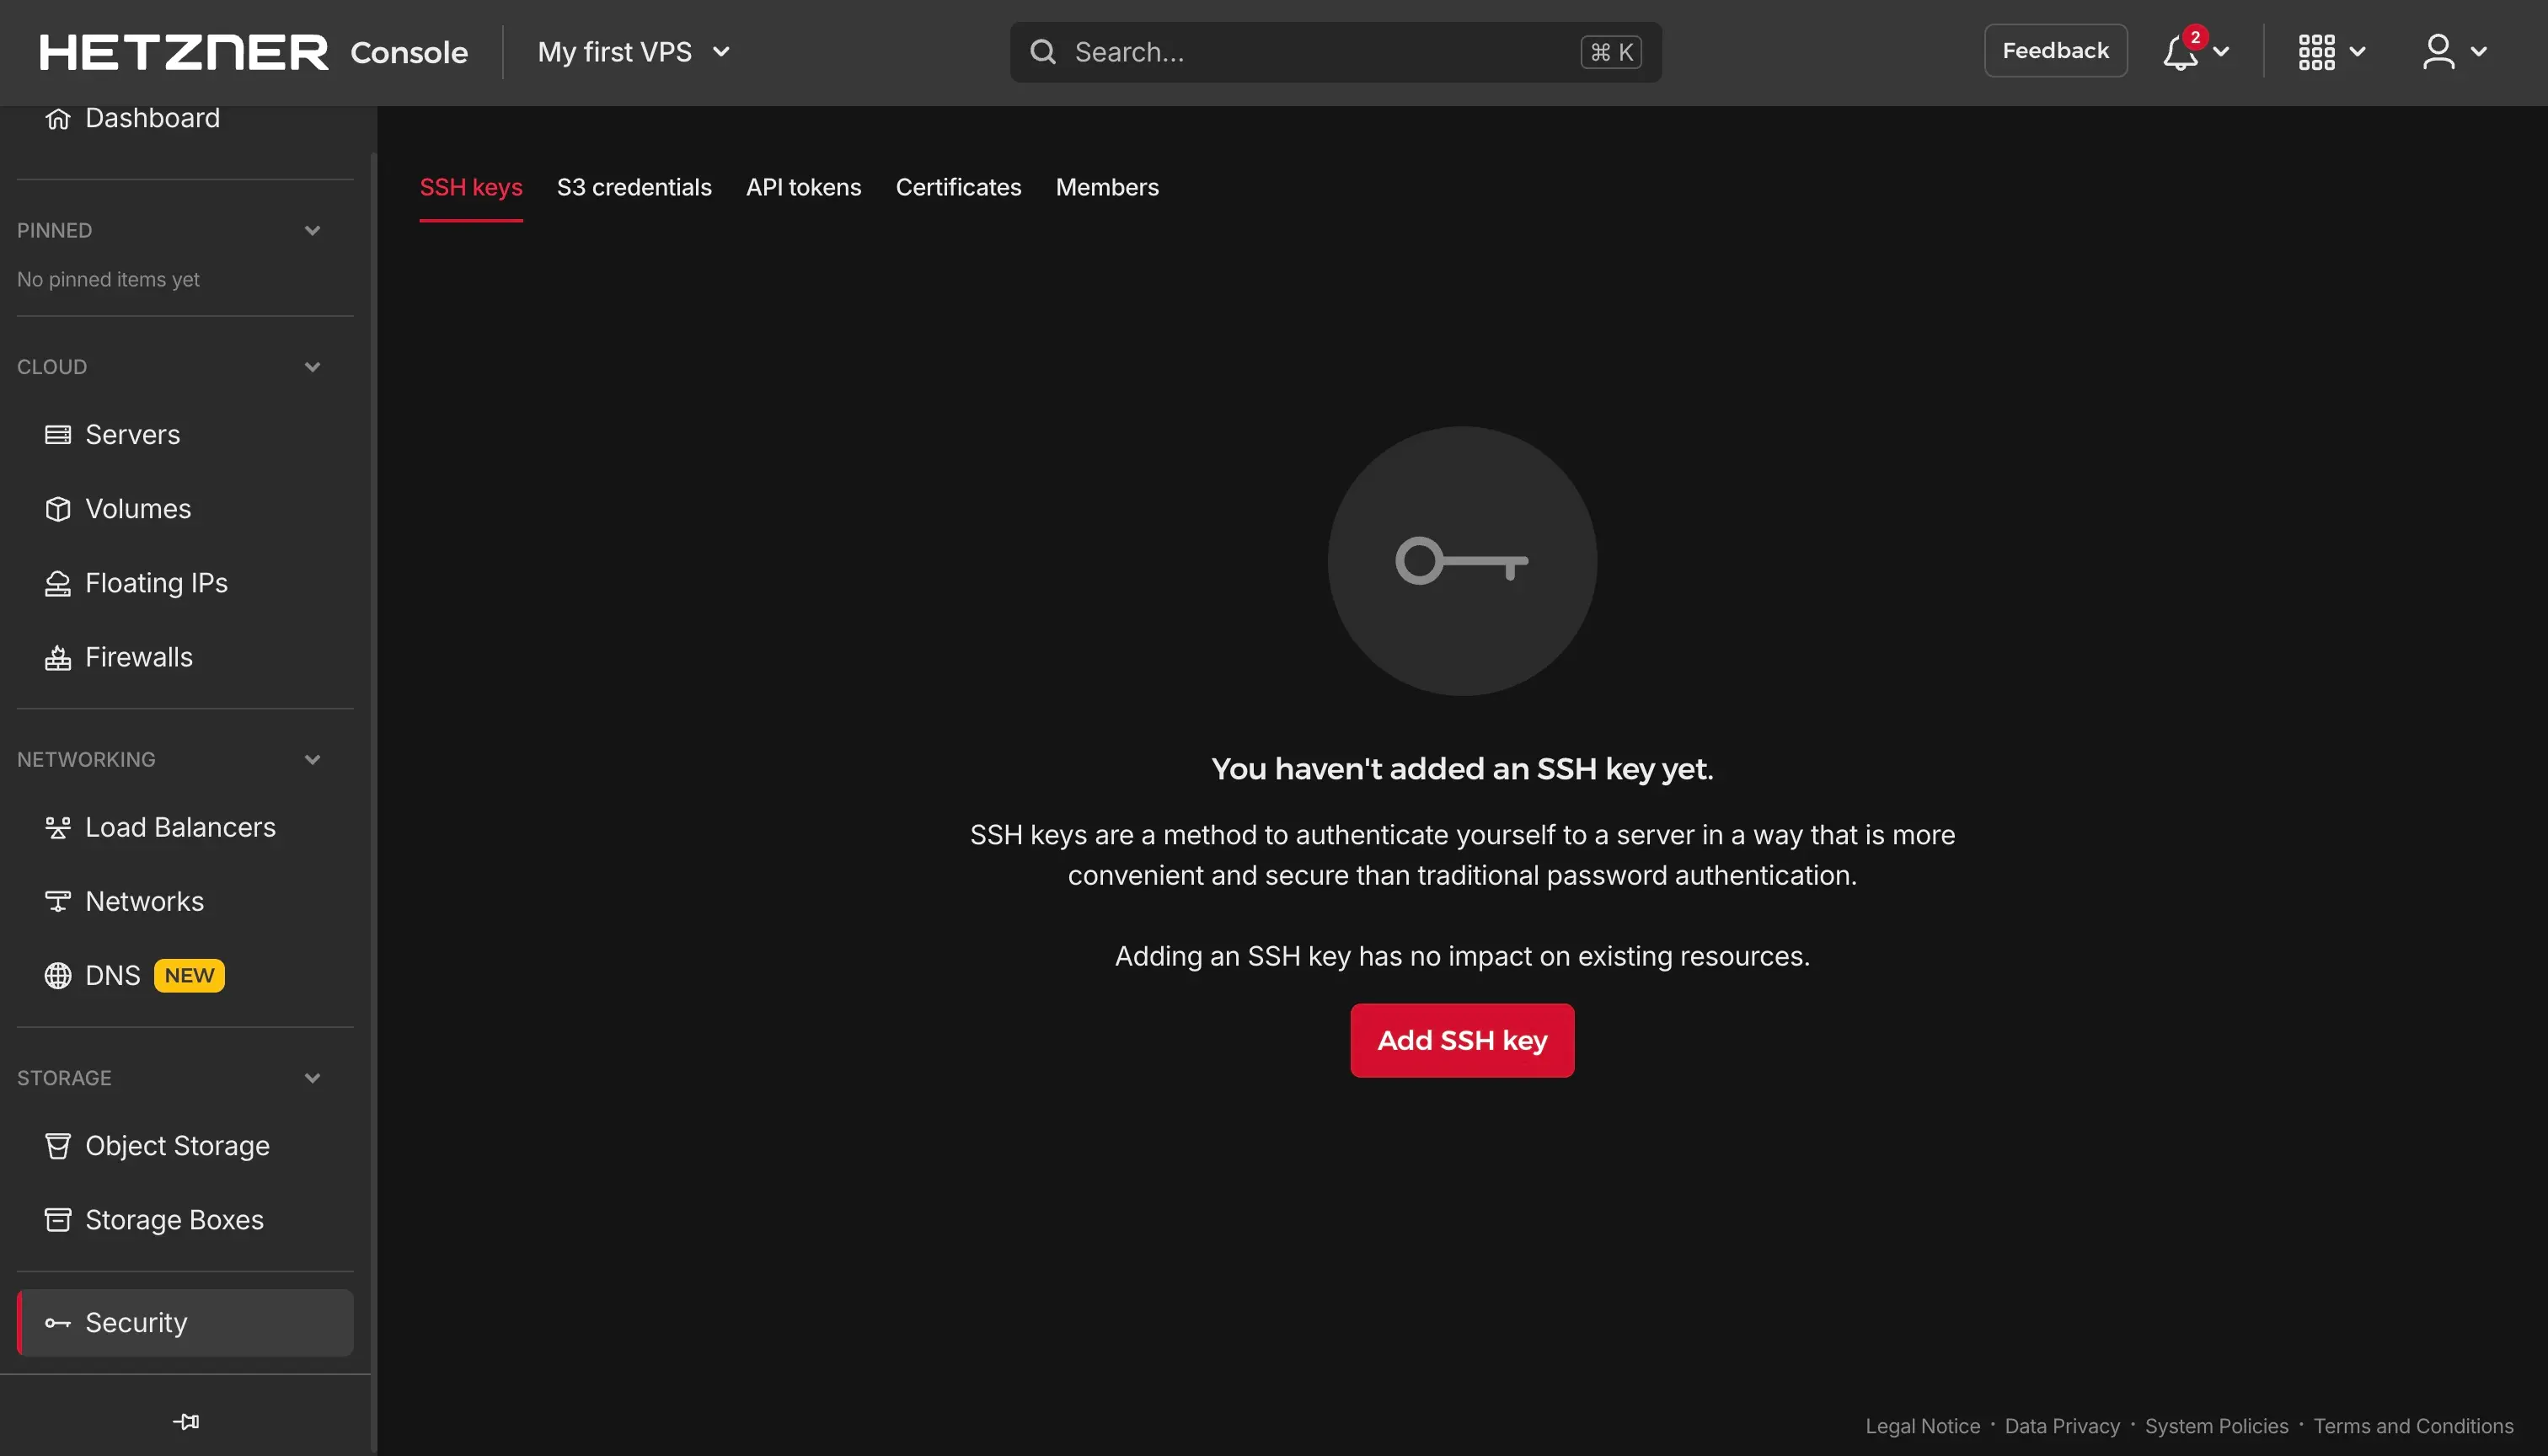
First (and just once), go to the Security settings in that project (lefthand menu, last item):
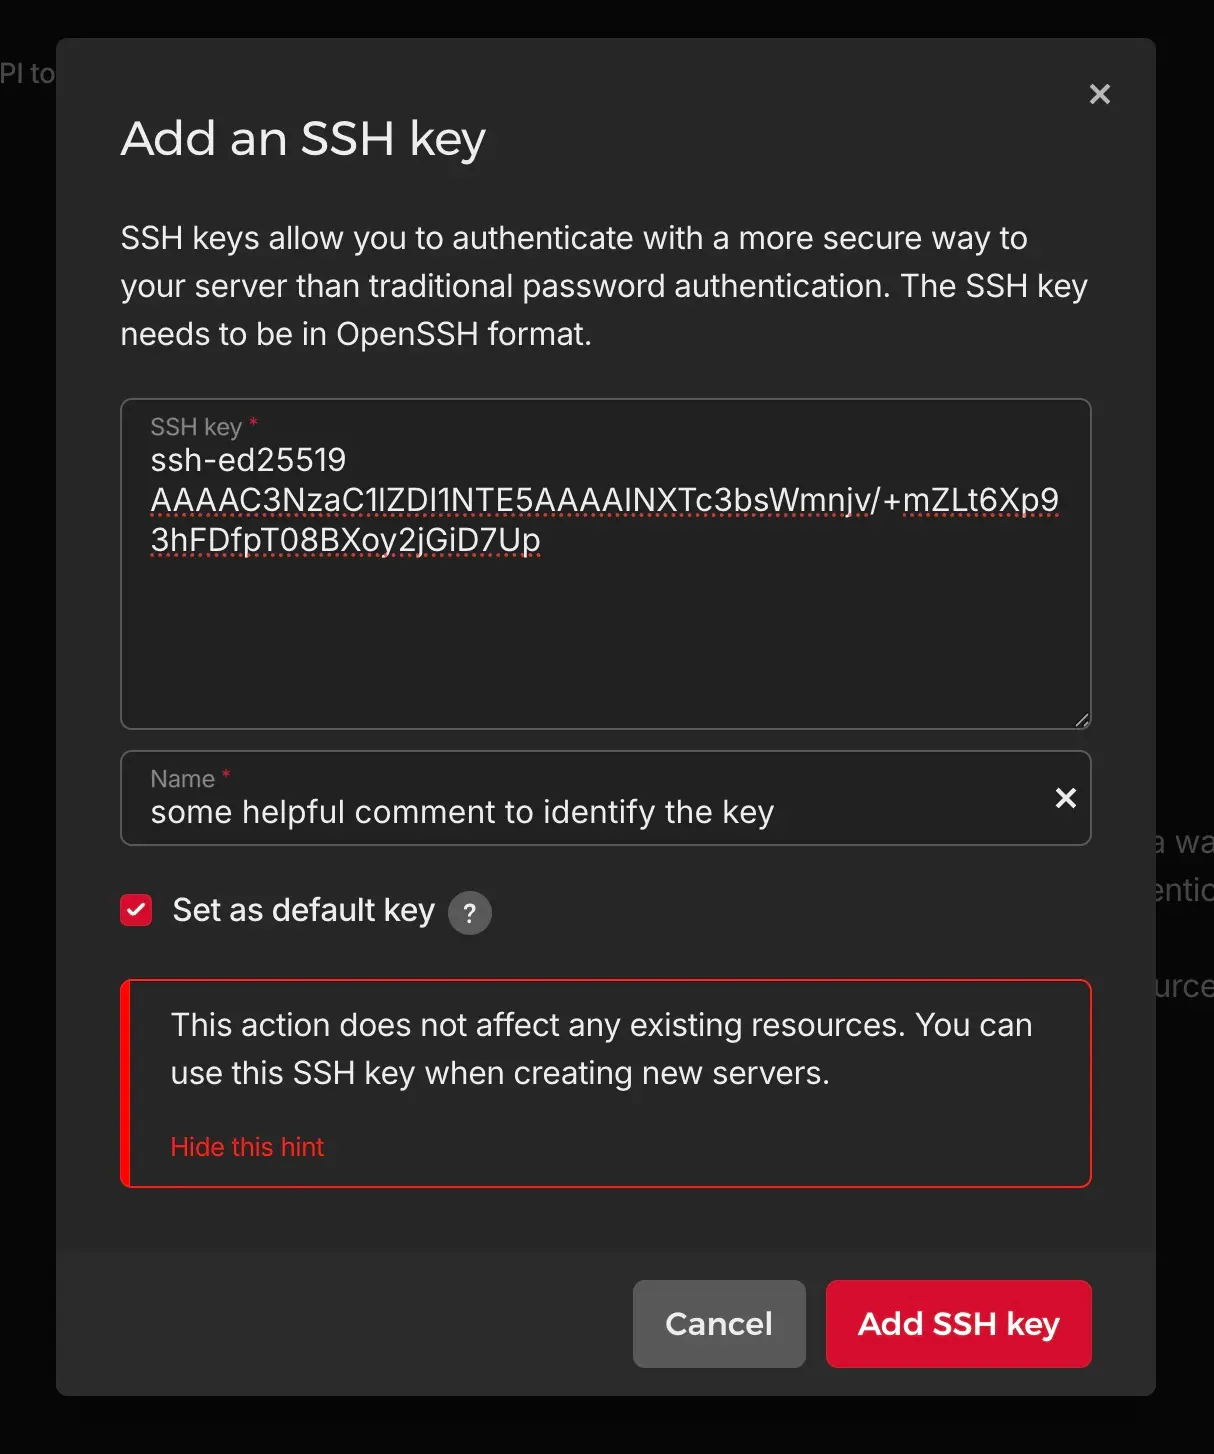
Now click “Add SSH key” and put in your public key (if suitable, check “default key” checkbox):
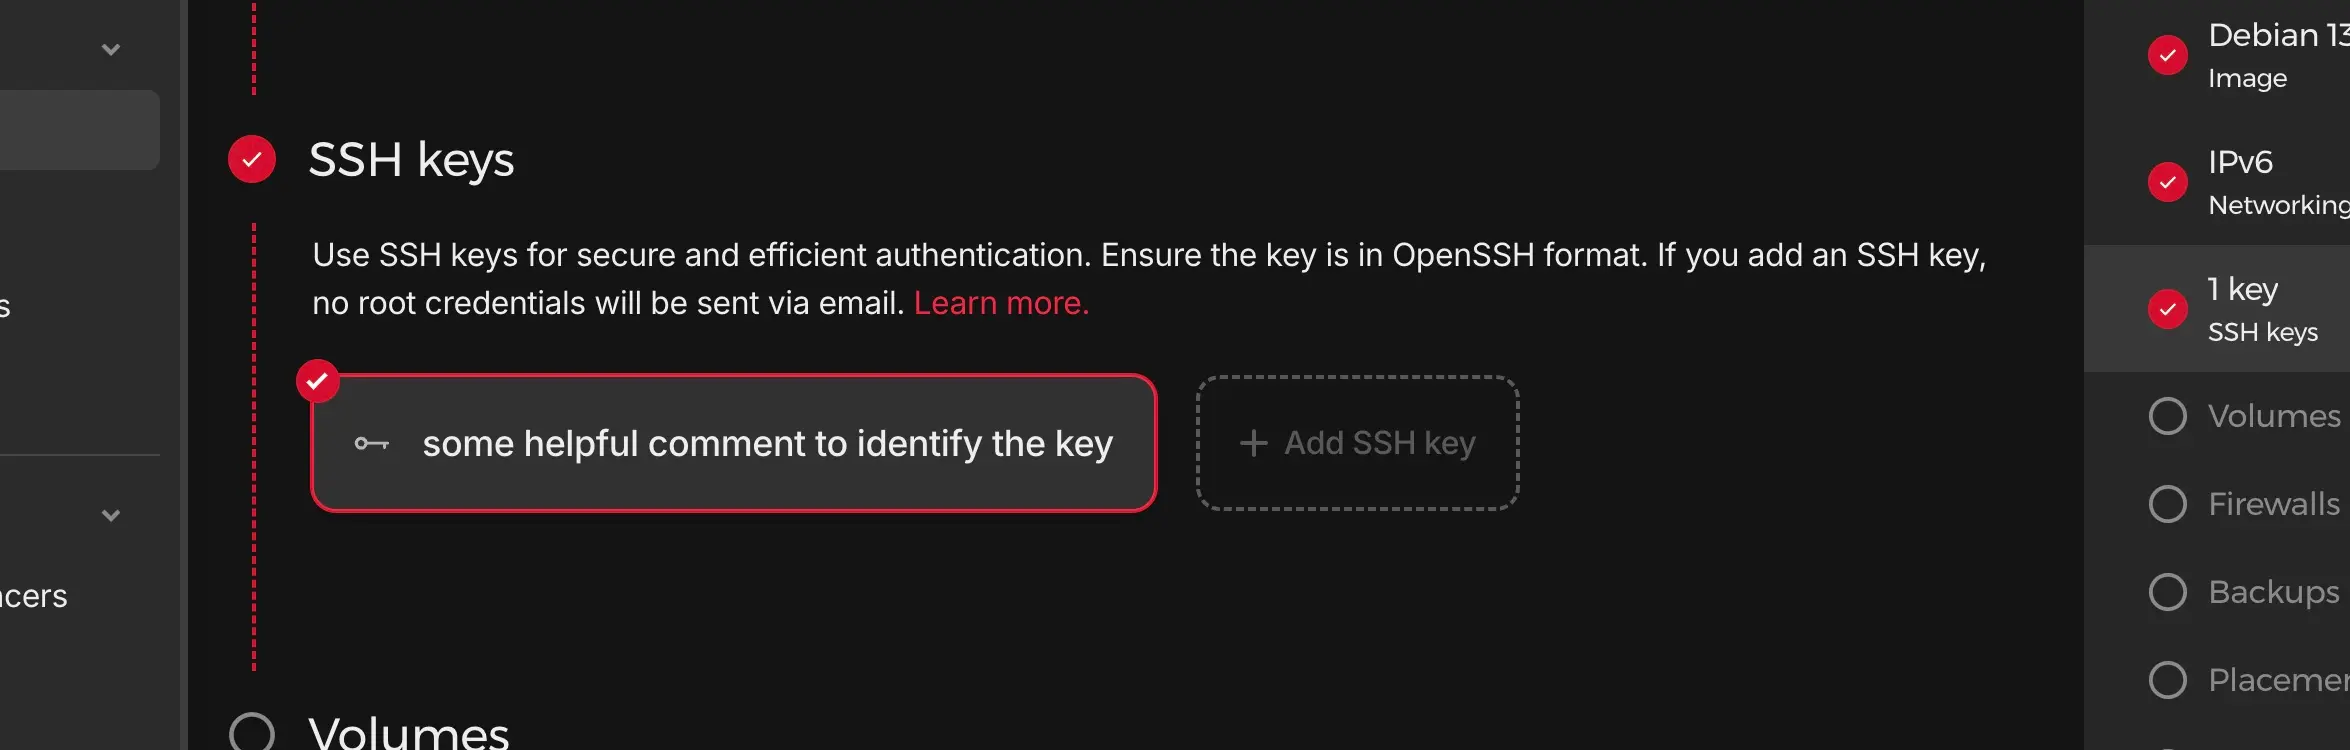
Now during the setup of the new Server, you can simply click the SSH key (default keys are preselected) and it’s directly added on the root user of that server.
Remember: You still need to enforce SSH key logins only (see above) to prevent users/attackers from using username/password.
Conclusion #
SSH provides us with a easy and safe way, to access our server remotely. We can use it to run commands (e.g. for maintenance) but also for other use-cases like file transfer or cloning git repositories and more.
It’s always cool to ease up our life, as long as it’s safe. So please enforce SSH keys on your servers to stay safe.